Introduction
This document provides step by step instructions to help developers get started using Wilcom Embroidery Web API.
Sign Up as a Developer on Wilcom API Developer Portal
Your company must first sign up as a developer on the Wilcom Developer Portal, https://developer.wilcom.com, and select an API plan.
Commercial details should be made with your company’s local Wilcom distributor.
Read the Documentation about the API
Sign in to the API developer Portal, and read the documents supplied there on the Documentation Page. The “Wilcom Embroidery Web API Product Description” document describes the conceptual architecture of the system and the embroidery functionality it can provide.
Get Application Id and Key from API Developer Portal
To get the application Id and key, you have to sign in the Developer Portal.
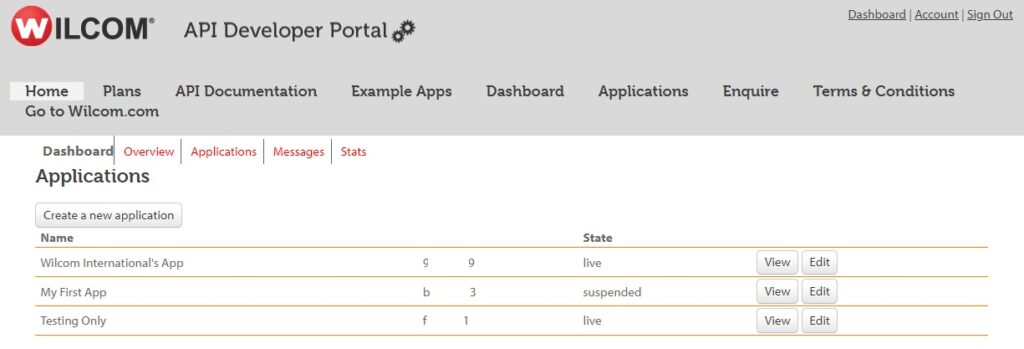
Navigate to the applications page:

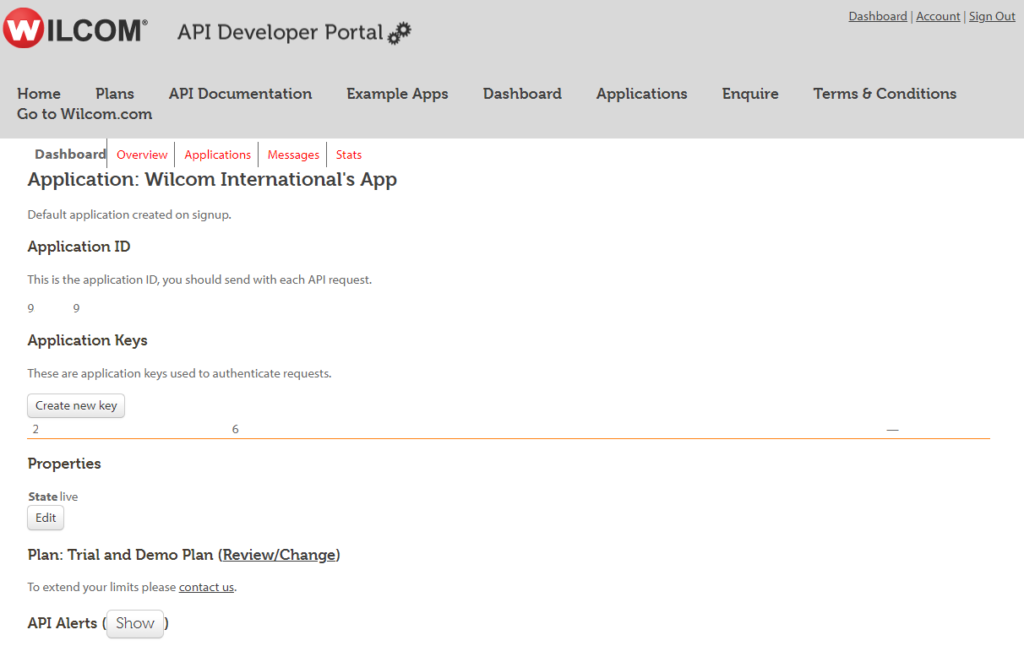
You will see a default application and its Application Id in a table. See the application key by clicking view button at right of an applications.

- You can optionally create multiple application keys for your application if you wish, but this is not recommended.
- Optionally specify an IP address to restrict use of your application to selected referrer addresses.
- If you want to Review or change the API Plan for your application, consult your company and make a request to Wilcom through the portal here.
- Your application state will be pending until it is approved.
Edit the Details of Your Application
- Edit the application name to match your intended use for your application.
- Edit the description of your application to explain what it does in user terms.
Calling Embroidery Web API Service
Embroidery Web API is a Restful API.
How to Call the API
Consume EWA is very simple. Just send request to the urls with appropriate post parameters. The API will return string which format is xml. The http status code of response is 200.
The http status code will not be 200 if exception occurs when API processing the request. The error information is returned too. Refer to the Embroidery Web API Interface Spec document.
URL for the API Service
Access the API at URL are as below:
http://ewa.wilcom.com/4.5 – this URL address is for general API calls
http://ewa.wilcom.com/4.5a – this URL is only for Autodigitizing calls (i.e., bitmapArtDesign, vectorArtDesign, bitmapArtTrueview, vectorArtTrueview)
APIs
It contains following APIs now:
URL to address below API calls – http://ewa.wilcom.com/4.5
- api/info
- api/designInfo
- api/designTrueview
- api/newDesignTrueview
- api/newDesign
- api/editDesignTrueview
- api/editDesign
- api/newLetteringPreview
- api/bitmapArtPreview
- api/vectorArtPreview
URL to address below API calls – http://ewa.wilcom.com/4.5a
- api/bitmapArtDesign
- api/vectorArtDesign
- api/bitmapArtTrueview
- api/vectorArtTrueview
Refer to the Embroidery Web API Interface Spec document which describes the web methods and their parameters in detail.
You must use your application Id and application key when calling an API web method.
RestSharp Library (.NET)
It is not straightforward to call Restful API from C# client. Fortunately, there is an open-source library to help: RestSharp (http://restsharp.org/).
We did some small changes to fit the EWA. You can download our version from the Documentation page on the API Developer Portal.
The library is based on .NET framework 4 and source code is managed by visual studio 2010 projects. Please download and modify the source code following the readme.txt to compile yours if you are using different .NET framework version.
Obtain the library
Download the sample source from the Documentation page on the API Developer Portal.
Get RestSharp.dll.
Or open WilcomRestSharp.sln in your visual studio 2010 then rebuild the DLLs.
The DLLs are .NET 4 assemblies. Please build from source code if you are working on earlier version of .NET framework.
EWA XML Source Library (.NET)
Wilcom provides EWA XML Source Library (.NET) to help the converting between xml string and objects. The library is based on .NET framework 4 and source code is managed by Visual studio 2010 projects.
Source is provided for .NET. Other languages will be supplied in future. Request your preferences.
The parameters of API are pretty simple: application id, application key and xml string. The format of xml string is defined in XML Data Package Definitions section in Embroidery Web API Interface Spec document.
Obtain the library
Download the sample source from the Documentation page on the API Developer Portal.
Get Wilcom.EWAEntity.dll and Wilcom.GeneralEntity.dll.
Or open EWAXmlLibrary.sln in your visual studio 2010 then rebuild the DLLs.
The DLLs are .NET 4 assemblies. Please build from source code if you are working on earlier version of .NET framework.
Import the library into your source code
Reference both Wilcom.EWAEntity.dll and Wilcom.GeneralEntity.dll in your project.
Import the name space in you source code.
using Wilcom.API.RecipeManager;
Use the library
Here is an example how to construct an xml string for lettering, then calling WILCOM_GenerateTrueview and paring the result xml string to object. Saving the generated trueview to Result.png at last.
XmlEWARecipe recipe = new XmlEWARecipe()
{
    recipe = new XmlKioskDocument()
    {
        decorations = new List<decoration>()
        {
            new lettering()
            {
                simple_lettering = new simple_lettering()
                {
                    alphabet_name = "Block2",
                    text = "My Lettering",
                    height = 20f
                },
                thread = new thread()
                {
                    color =  Color.Red.R | Color.Red.G << 8 | Color.Red.B << 16
                }
            }
        },
        output = new output()
        {
            trueview_file = "ResultImage.png",
        }
    }
};

string xmlRecipeString = StringXmlSerializer.FastSerialize<XmlEWARecipe>(recipe, StaticXmlSerializers.GetSerializer<XmlEWARecipe>(null));
	var client = new RestClient("http://ewa.wilcom.com/1.3");

       var request = new RestRequest("api/newdesigntrueview", Method.POST);
       request.AddParameter("appId", EWADeveloperAppId);
       request.AddParameter("appKey", EWADeveloperAppKey);
       request.AddParameter("RequestXml", xmlRecipeString);

       IRestResponse httpResponse = client.Execute(request);

       if (httpResponse.StatusCode == HttpStatusCode.OK)
       {
XmlEWAResponse response = StringXmlSerializer.FastDeserialize<XmlEWAResponse>(httpResponse.Content, StaticXmlSerializers.GetSerializer<XmlEWAResponse>());

byte[] result= Convert.FromBase64String(response.files[0].filecontents);
              File.WriteAllBytes("Result.png", result);
         }